Working with the simulator
Customise your route
Create a route on Google Maps
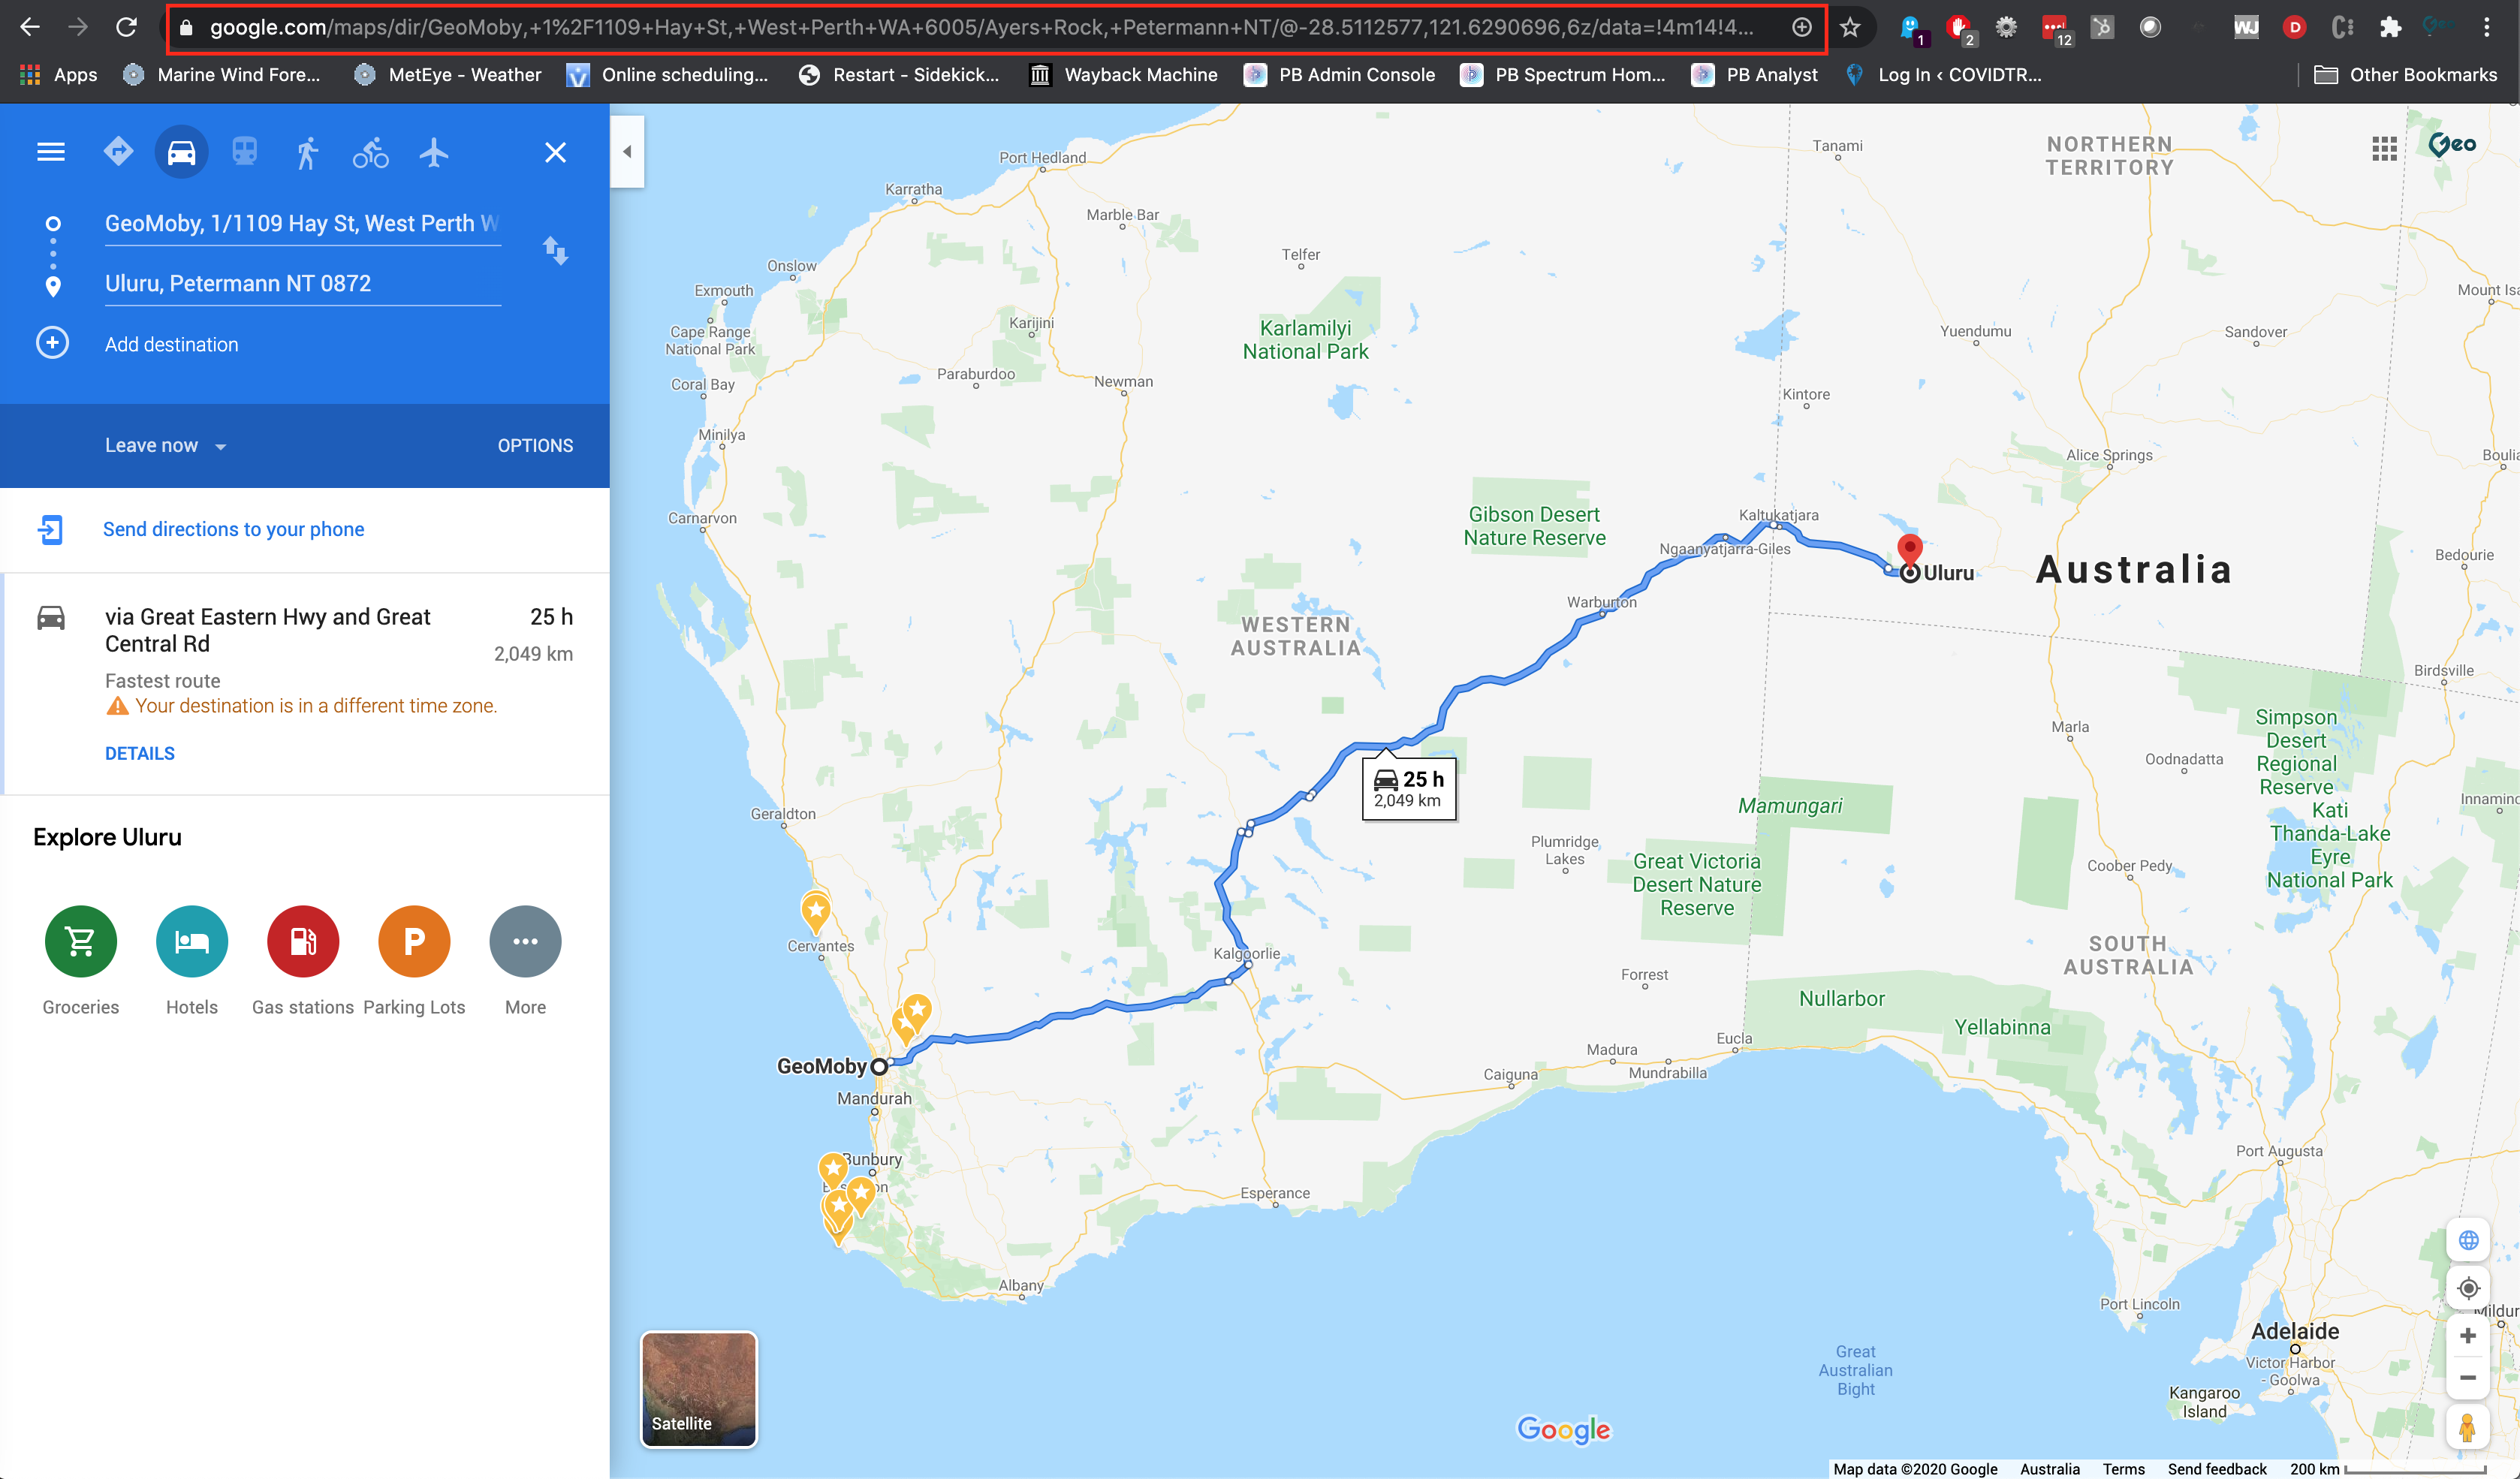
Grab the Google Maps url, open GPSVisualiser and generate your GPX file

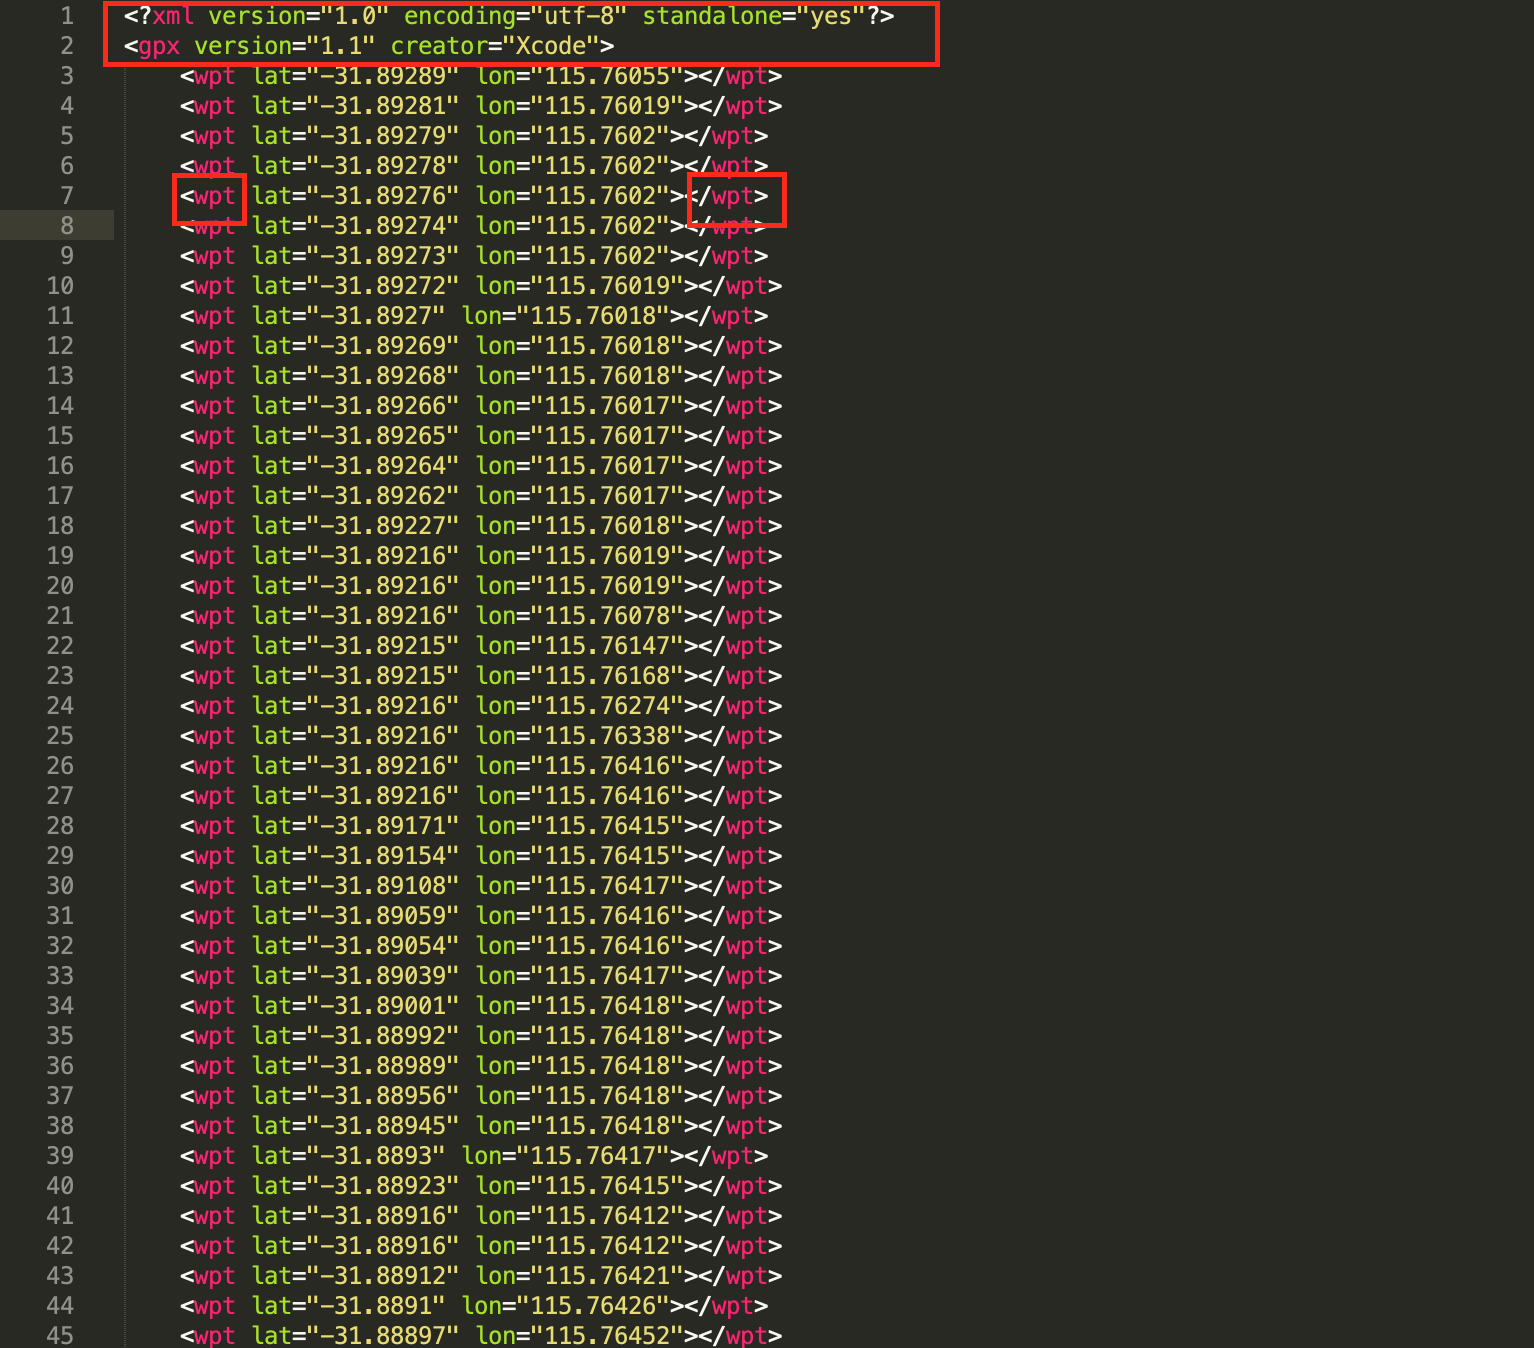
Make the appropriate changes in your GPX file
<?xml version="1.0" encoding="utf-8" standalone="yes"?>
<gpx version="1.1" creator="Xcode">
    <wpt lat="-31.89289" lon="115.76055"></wpt>
    <wpt lat="-31.89281" lon="115.76019"></wpt>
    <wpt lat="-31.94999" lon="115.84606"></wpt>
</gpx>
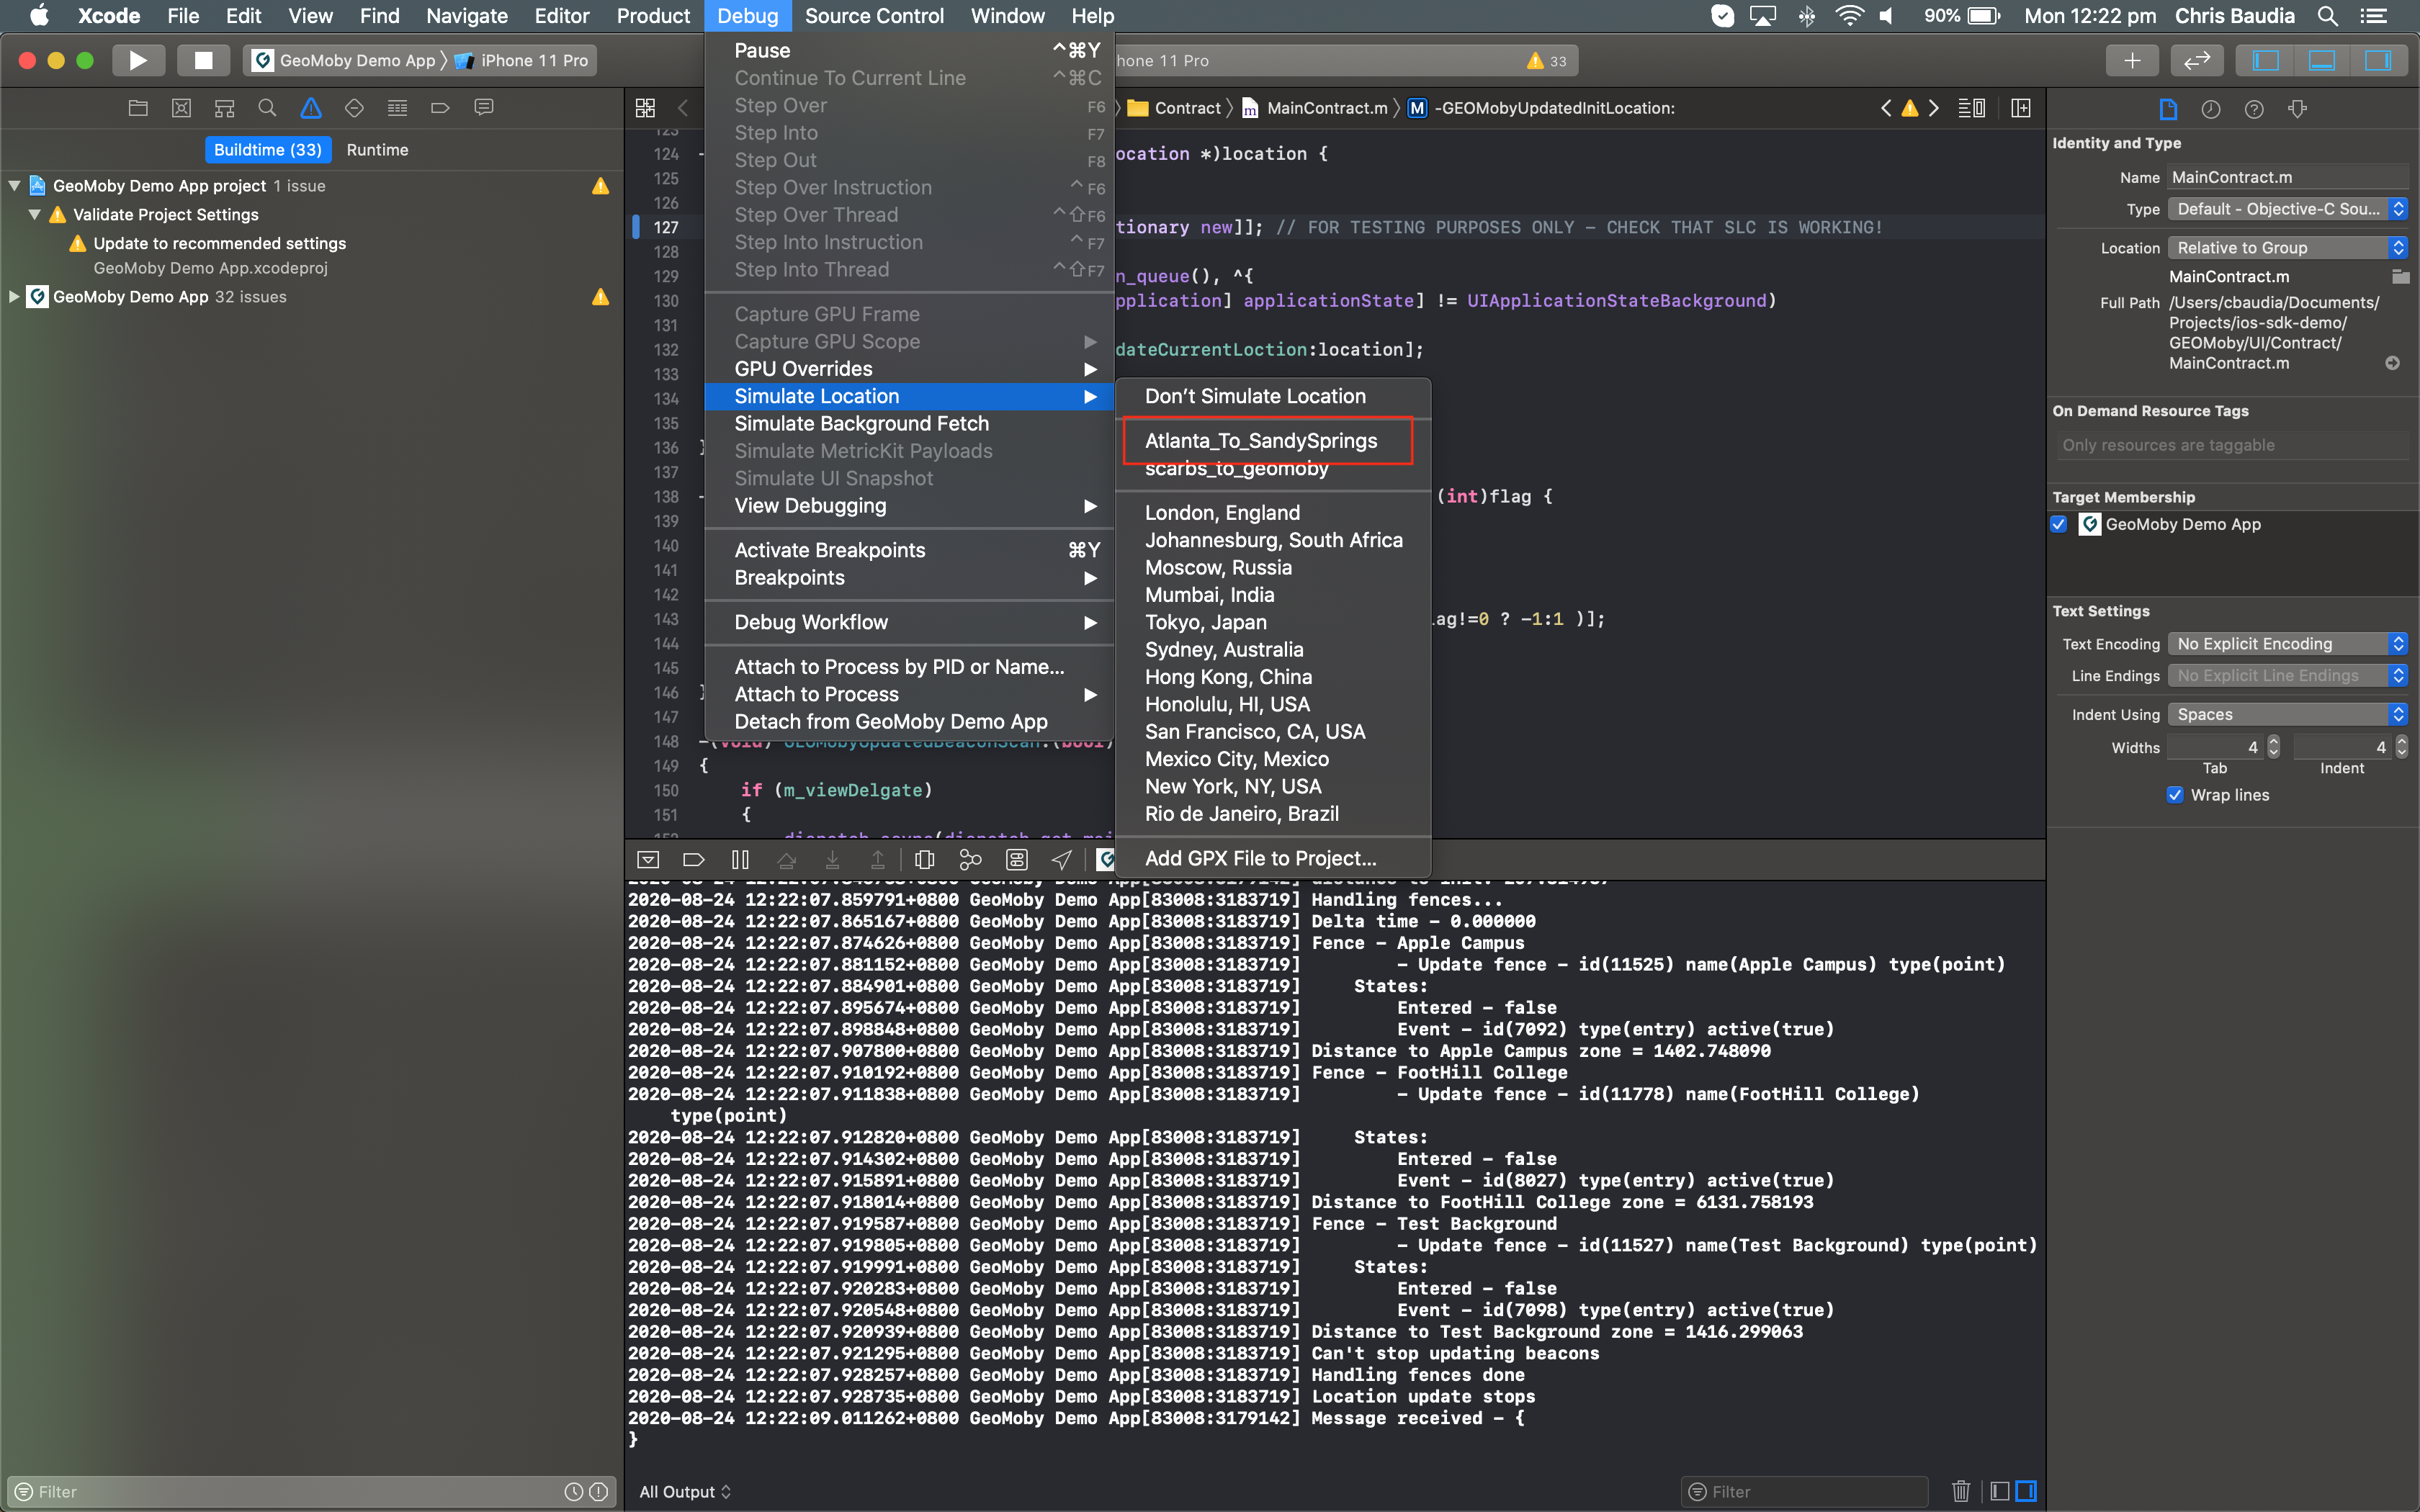
Add your GPX file in your project Simulate Location > Add GPX file to Project
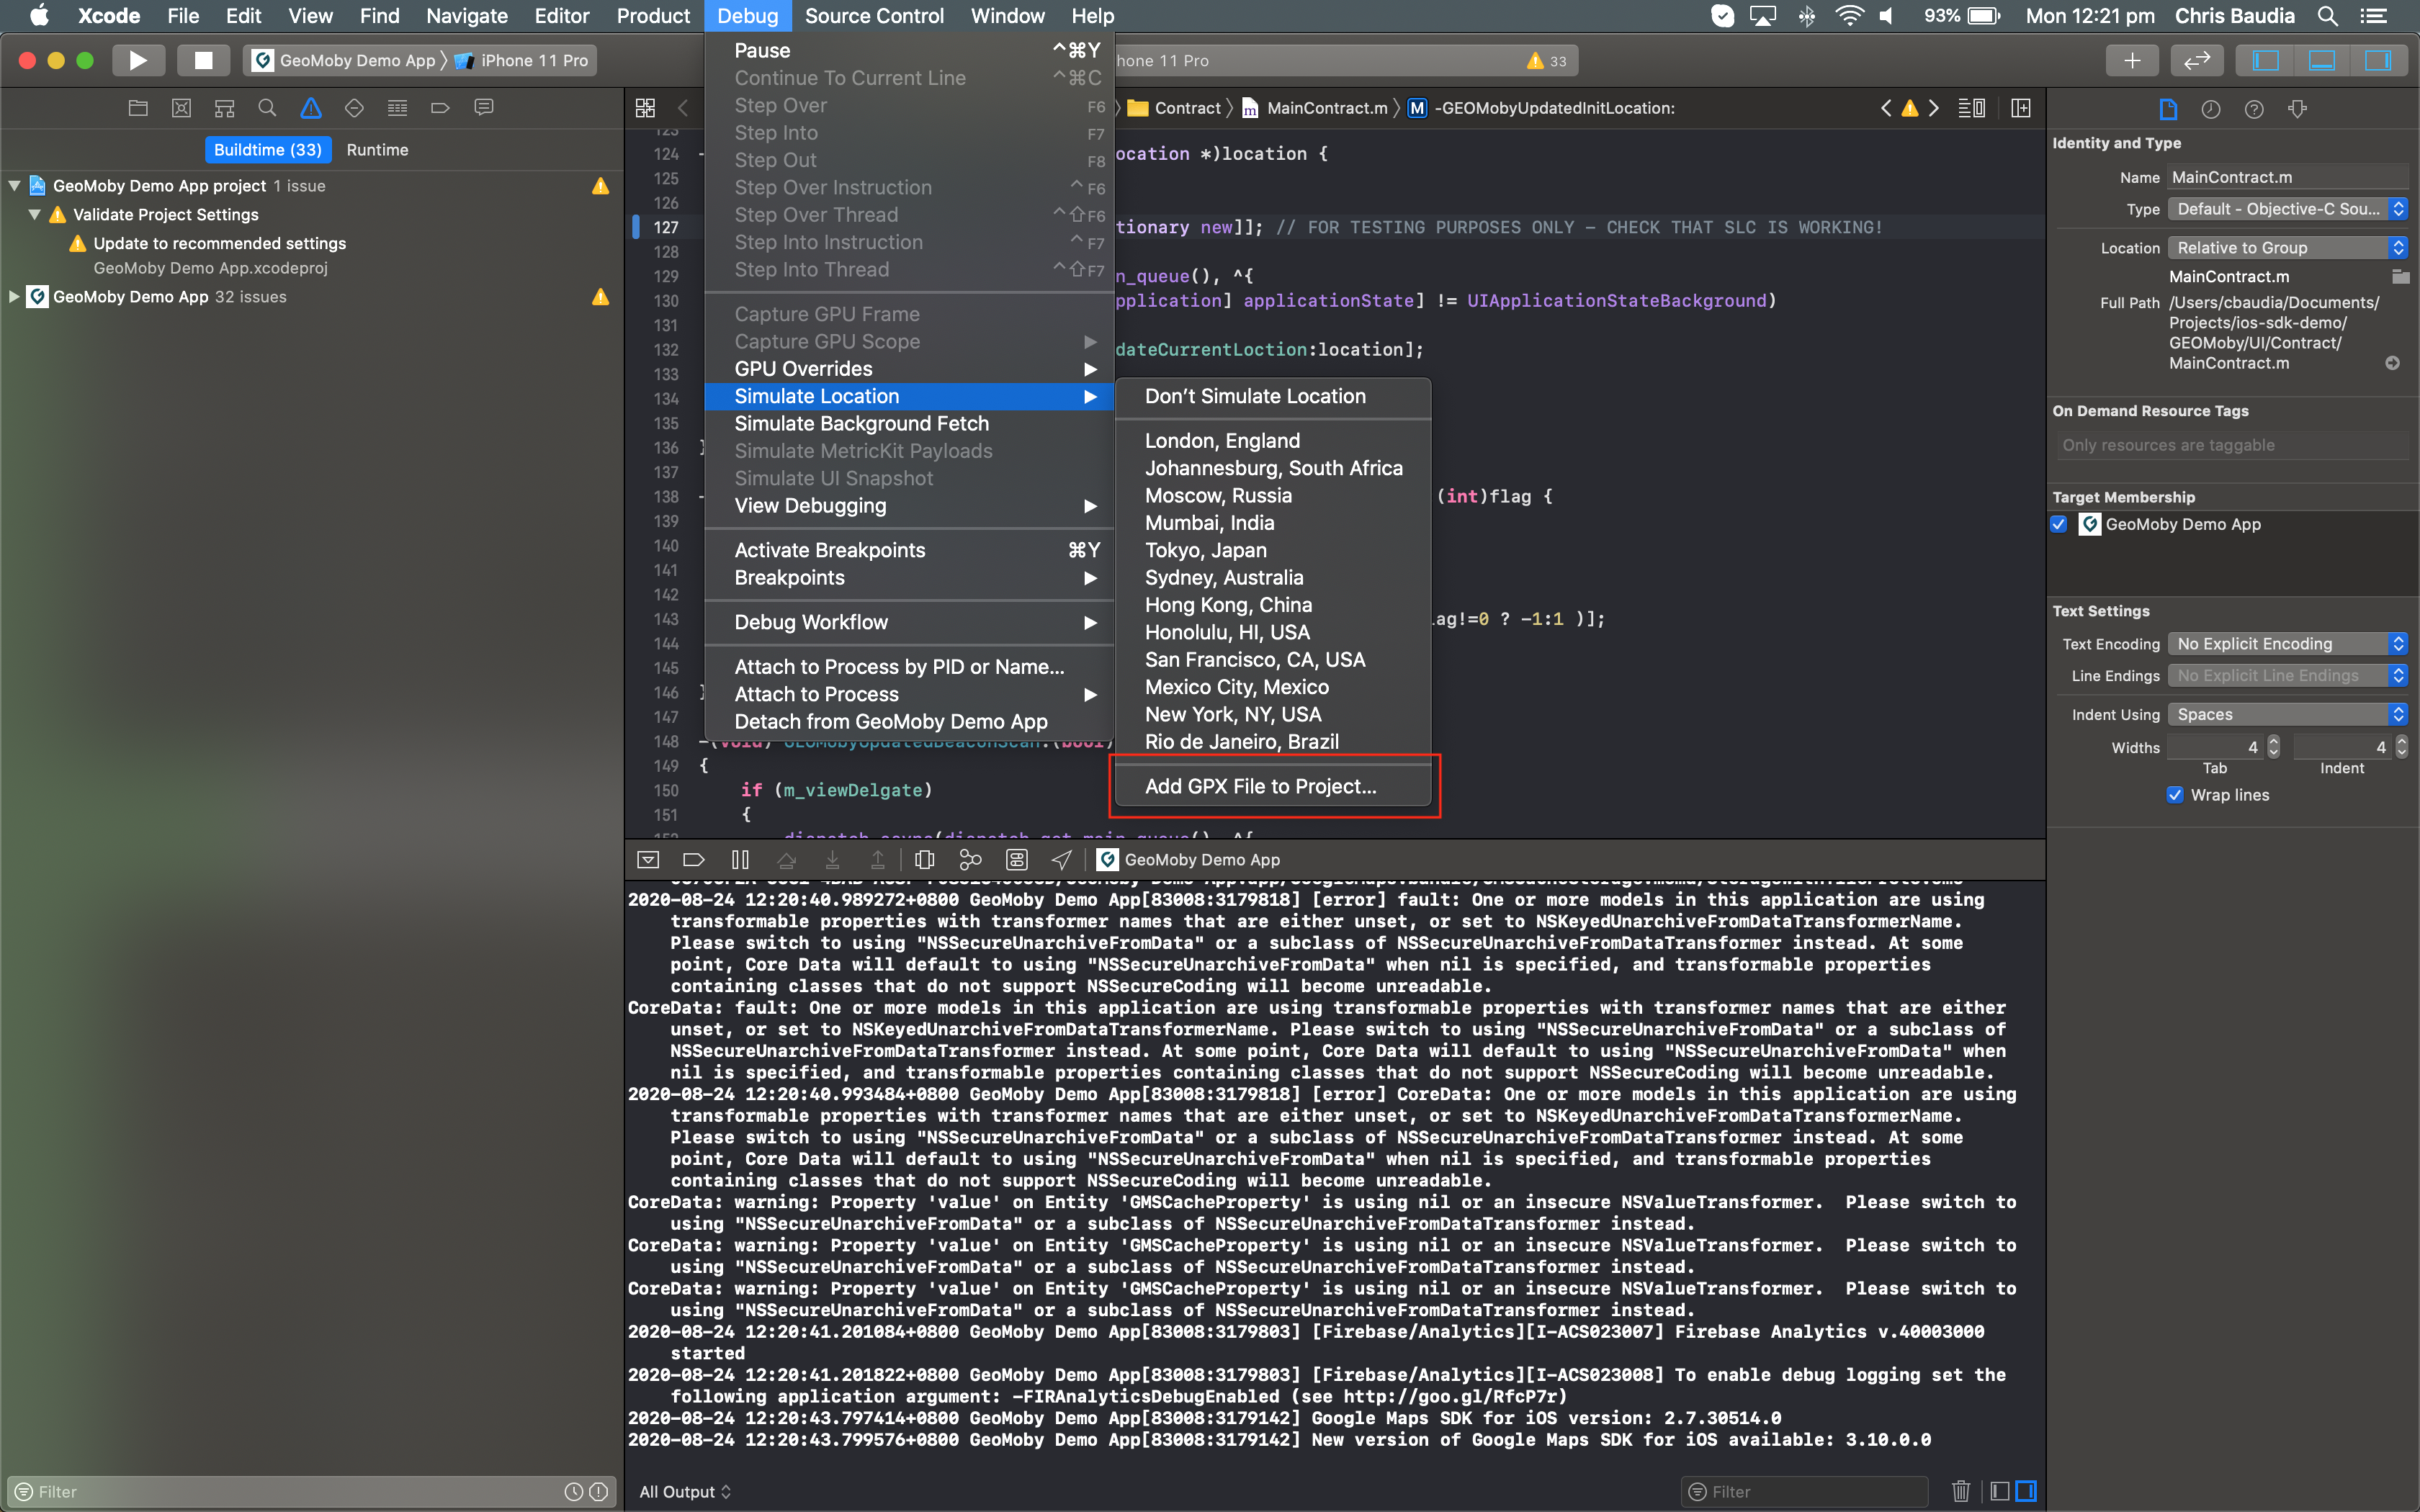
Build your code, run it on the simulator and select Simulate Location > {your_gpx_file} in order to start the route from your GPX file
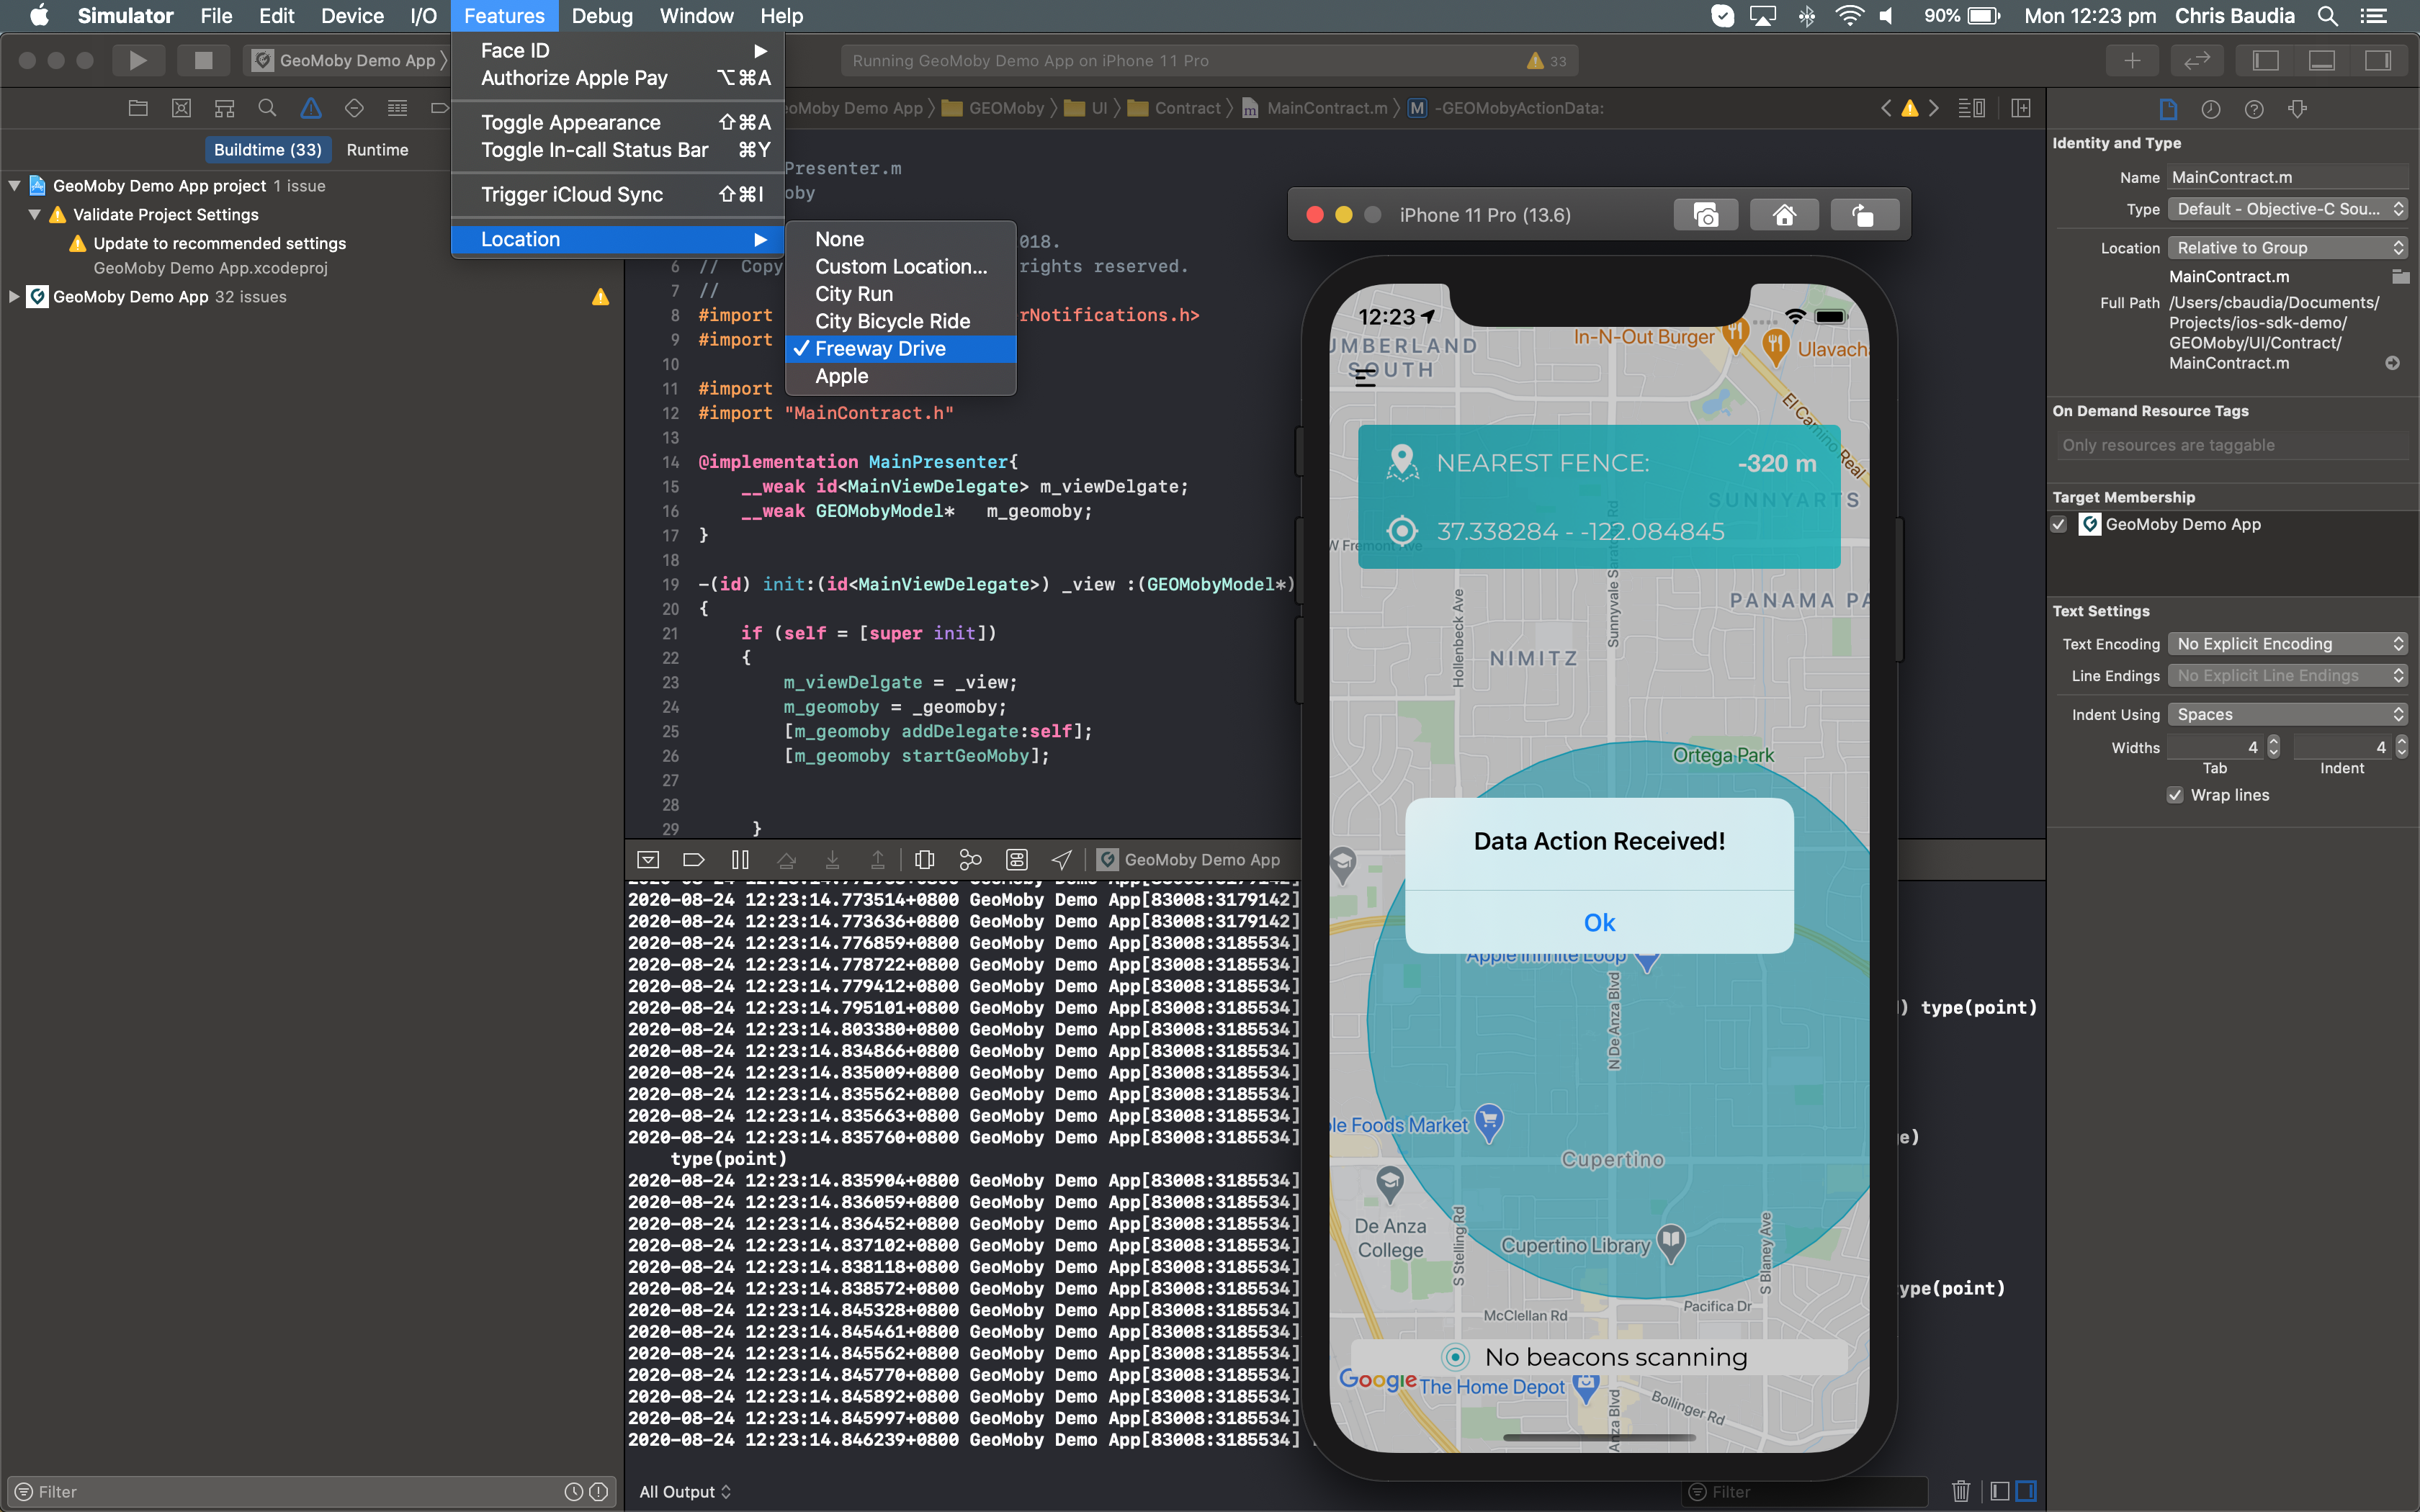
Use XCode Location from the simulator
You can also use Location simulation and freeway drive (from the simulator) in order to test background modes and Significant Location Changes
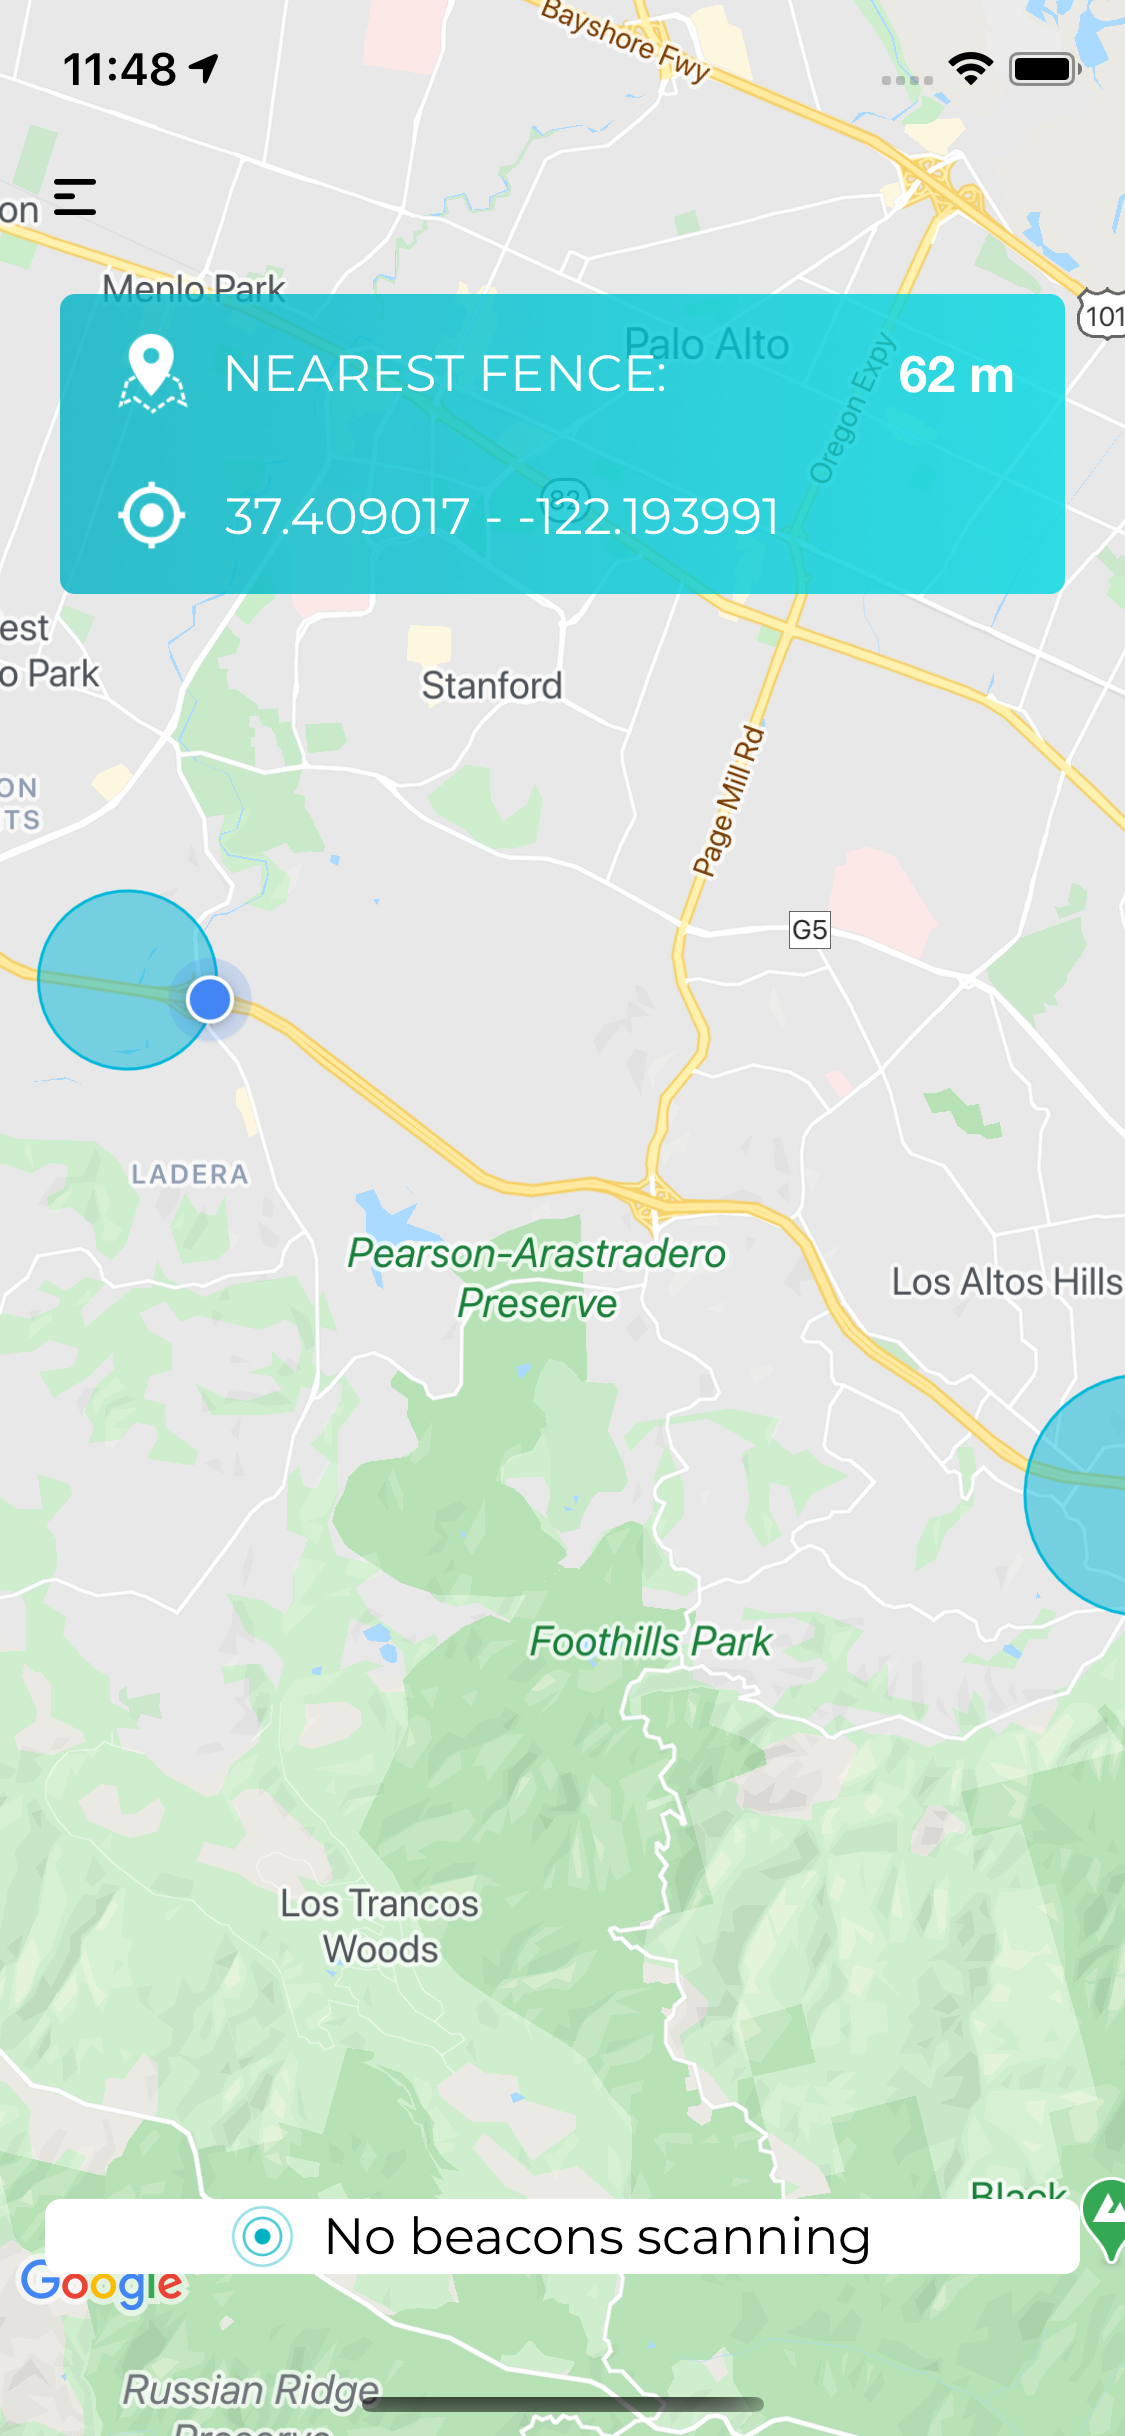
Create some geofences along the freeway
Run the simulator and start the freeway drive
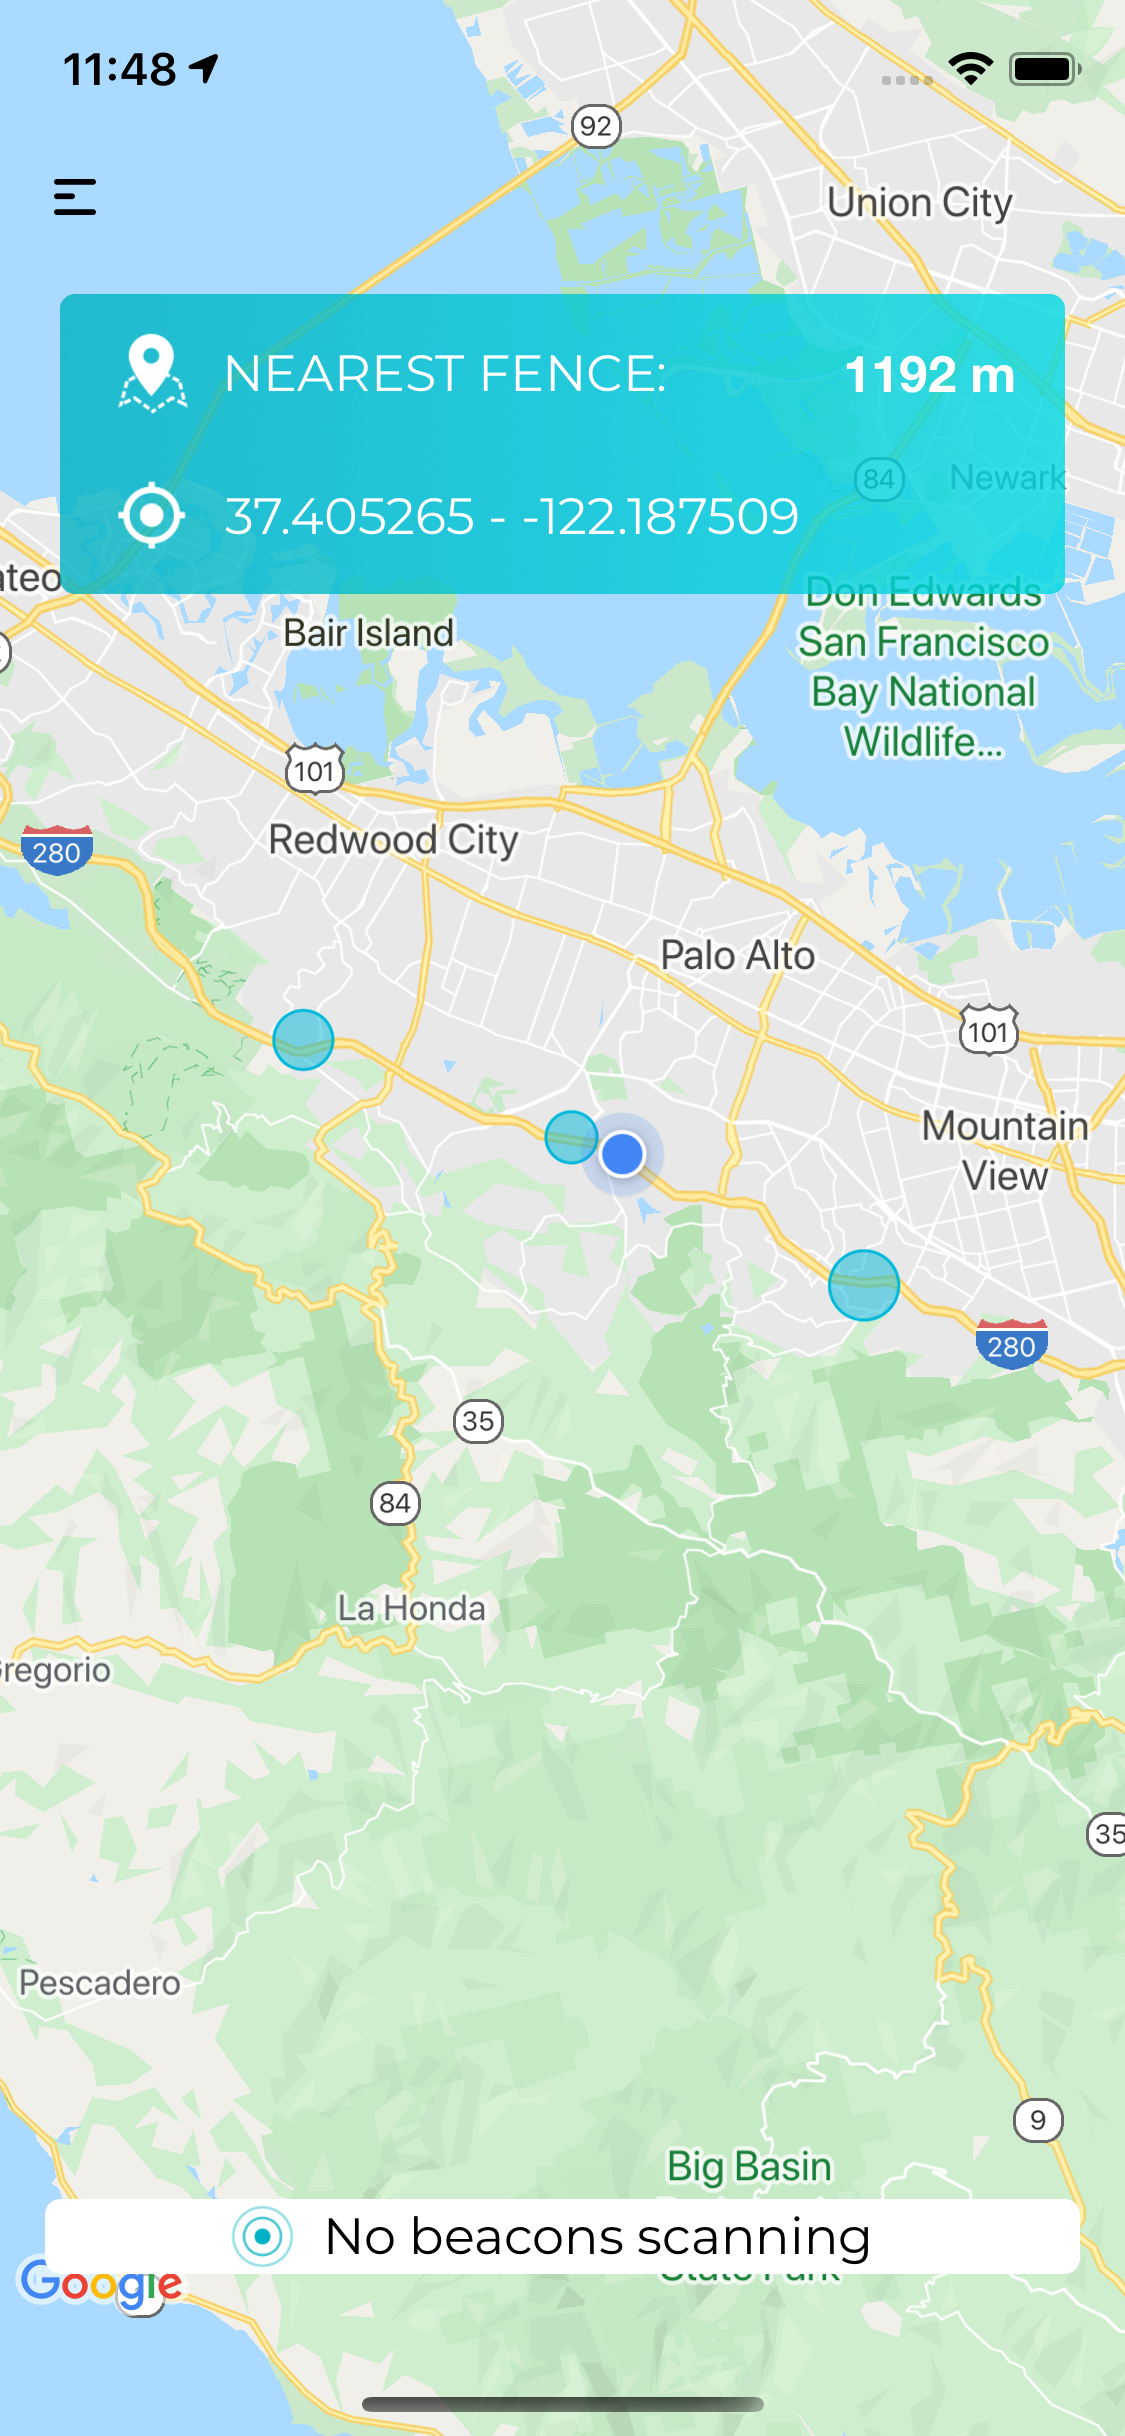
Visualise your drive on the freeway
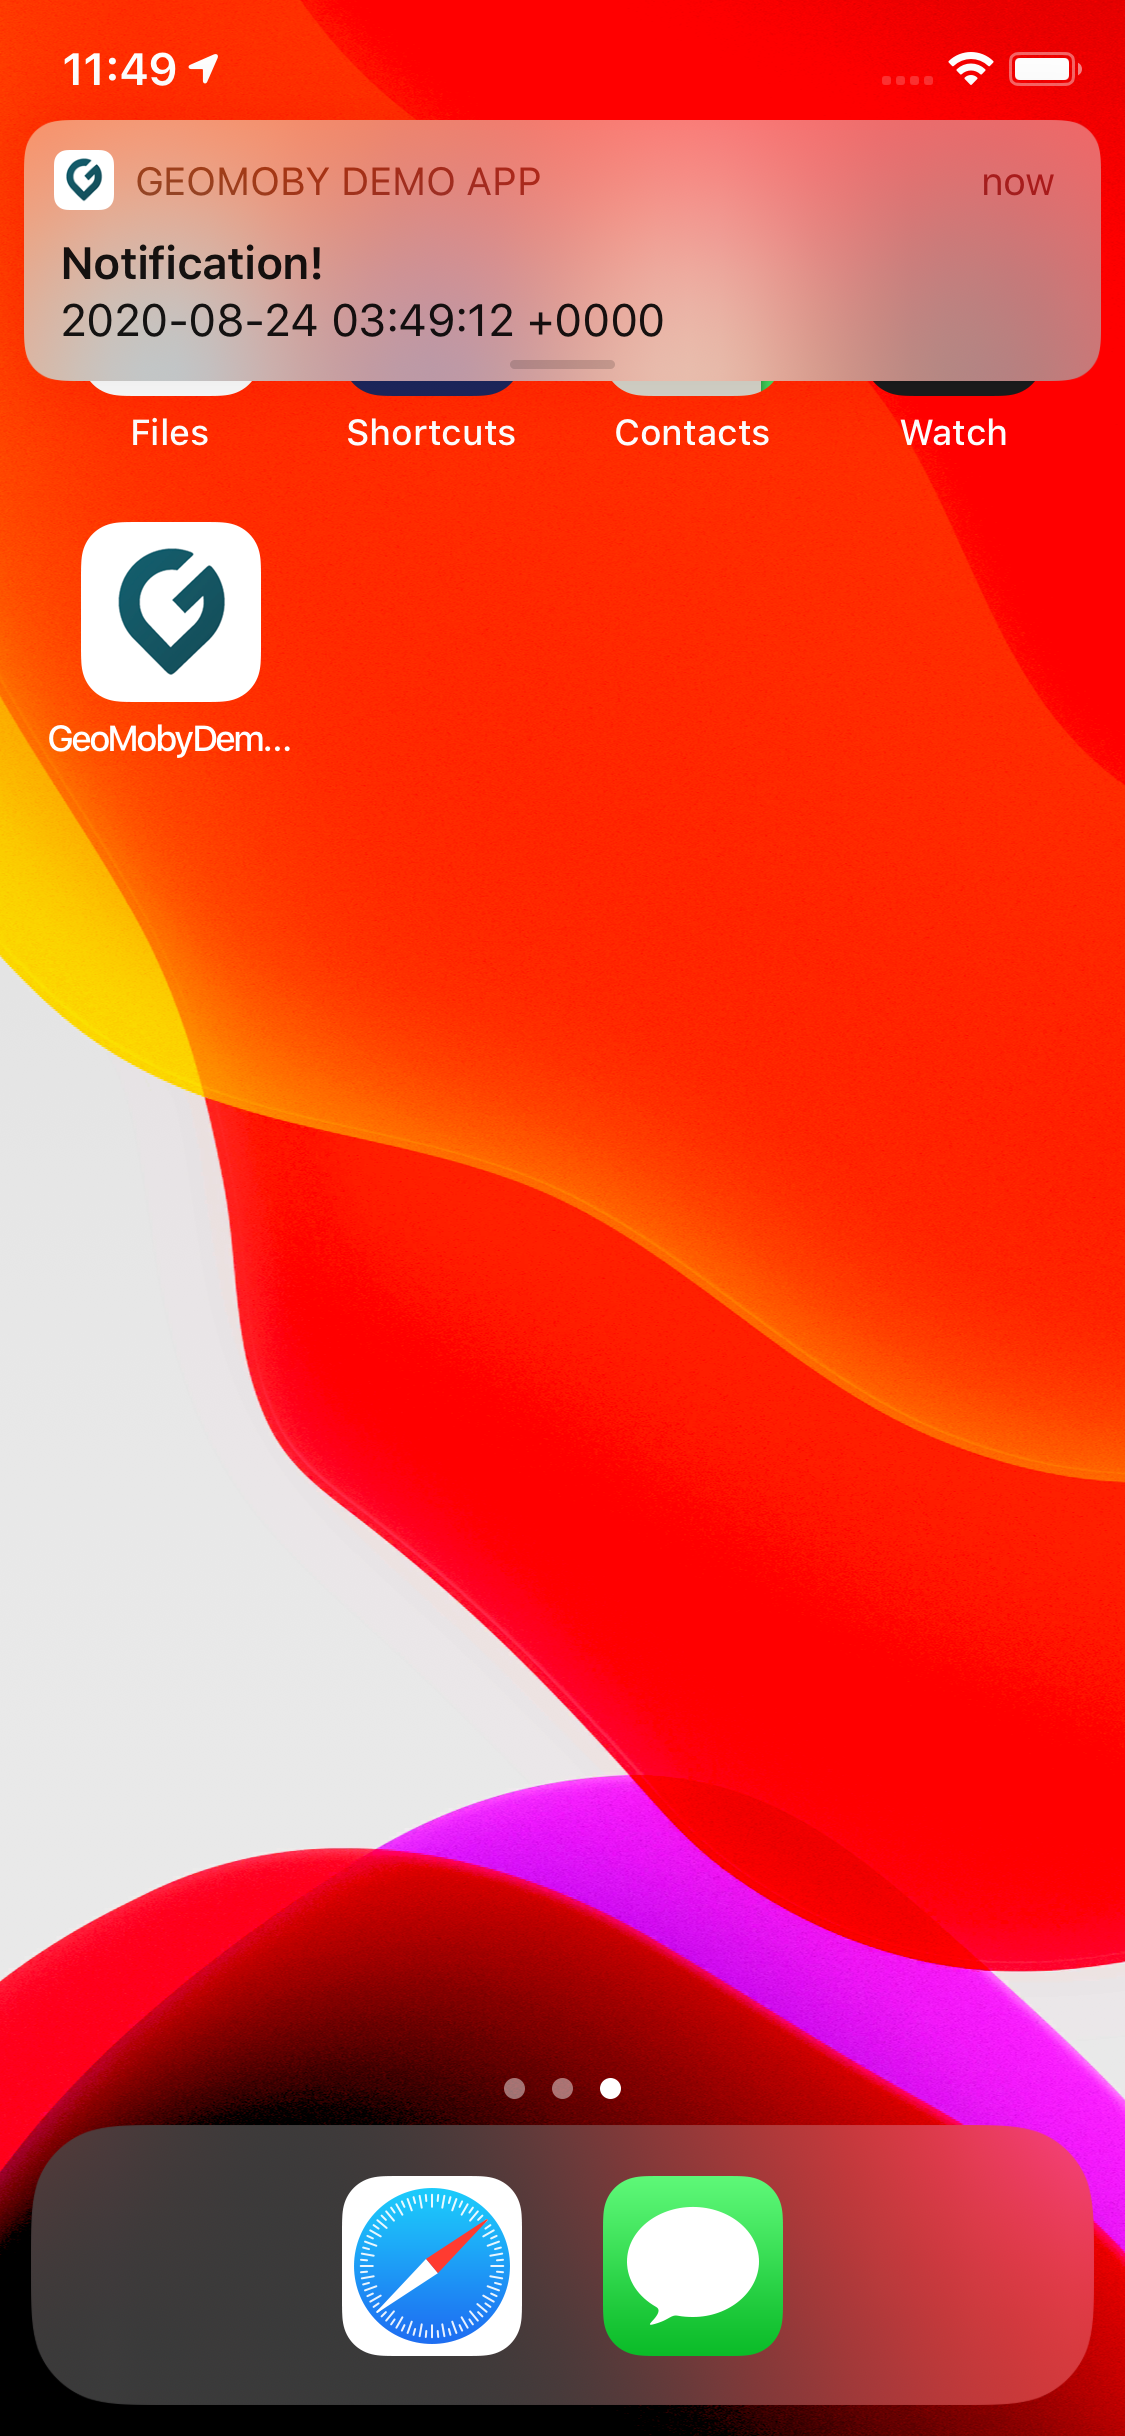
Observe notifications coming through in foreground, background and when the app is terminated (notifications)